MySQL Shell is a powerful tool for managing MySQL databases, and one of its most exciting features is the ability to extend its functionality using plugins. If you're a Python developer, you can create custom plugins to automate tasks, add new commands, or
integrate MySQL Shell with other tools. However debugging the python code could be cumbersome for mysql-shell given the python code requires some specific objects available only when running inside the shell.
In this blog post, we'll walk you through the steps to set up your development environment for creating MySQL Shell plugins in Python while able to modify and debug the mysql-shell itself.
Prerequisites
Before we dive into the setup, ensure you have the following installed on your system:
- MySQL Shell: Download and install MySQL Shell from the official MySQL website.
- Python 3.8 or later: MySQL Shell plugins require Python 3.8+. You can download Python from python.org.
- A code editor: Use your favorite code editor, such as VS Code
- Git: Optional, but useful for version control.
A directory structure as follow:
mysql_source/
├── boost
├── mysql-8.4.4  <-- directory where we compile the mysql server
├── mysql-server <-- directory with the source code (from git or package)
├── mysql-shell  <-- directory with the mysql-shell code from git
├── mysql-shell-build-vs <-- directory where we build using Visual Studio
└── mysql-shell-plugins  <-- directory with the example plugin
Step 1: Collect and compile MySQL server code
If you want to clone the MySQL repository:
git clone https://github.com/mysql/mysql-server.git
git fetch
git checkout tags/mysql-8.4.4 -b mysql-8.4.4
Or just download the source code from the website for that specific release:
curl https://dev.mysql.com/get/Downloads/MySQL-8.4/mysql-8.4.4.tar.gz - o mysql-8.4.4.tar.gz
In both cases once you have the code locally we need to configure and build the libraries.
For more information about how to compile and dependencies check here
Then we go inside the compile directory (mysql-8.4.4) and configure it:
cmake /<path>/mysql_source/mysql-server -DCMAKE_INSTALL_PREFIX=/<path>/mysql_templates/mysql-8.4.4 -DWITH_DEBUG=1 -Dprotobuf_BUILD_SHARED_LIBS=ON
And we compile the needed libraries:
cmake --build . --target mysqlclient
cmake --build . --target mysqlxclient
There is no need to compile the whole server, unless you really want to.
Step 2: Collect and compile MySQL Shell code
Once the server libs are prepared then go for mysql-shell.
Get the code:
git clone https://github.com/mysql/mysql-server.git
git fetch
git checkout tags/8.4.4 -b 8.4.4
Now my advice is to always do a compilation outside the code editor to be sure we have all the needed components, for more info check here
To configure:
cmake /<path>/mysql_source/mysql-shell -DMYSQL_SOURCE_DIR=/<path>/mysql_source/mysql-server/ -DMYSQL_BUILD_DIR=/<path>/mysql_source/mysql-8.4.4 -DHAVE_PYTHON=1 -DHAVE_V8=0 -DWITH_TESTS=1 -DCMAKE_BUILD_TYPE=Debug -DCMAKE_INSTALL_PREFIX=/<path>/mysql_source/mysql_shell_bin
If all went well you can check if the mysql-shell works properly running it from the destination path (in the example) /opt/mysql_source/mysql_shell_bin/bin/mysqlsh
Step 3: Set Up a Python Virtual Environment
To avoid conflicts with other Python projects, it's a good idea to create a virtual environment for your MySQL Shell plugin development.
Open your terminal and navigate to your project directory.
Create a virtual environment:
python -m venv mysqlsh-plugin-env
Activate the virtual environment:
On macOS/Linux:
source mysqlsh-plugin-env/bin/activate
Verify that the virtual environment is active. Your terminal prompt should now show the name of the virtual environment.
Step 4: For lazy people (as myself) download and use existing plugin demos.
Our dear friend Lefred has built a very nice suite that I normally use as a starting point.
Get the code, go to your mysql_source directory and:
git clone https://github.com/lefred/mysqlshell-plugins.git
In mysql-shell at the moment you can load the plugin at startup only if they are located in the sub-directory ~/.mysqlsh/plugins or where the lib/mysqlsh/plugins is located. See FR here for a more convenient way to dynamically pass the path to browse.
Anyhow for now and the purpose of this blog let us use a a trick and create a symlink:
mkdir ~/.mysqlsh/plugins
ln -s <path>/mysql_source/mysql-shell-plugins/demo ~/.mysqlshell/plugins/demo
Ok now our code side is set.
Download and configure VisualStudio.
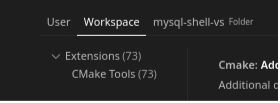
Add few extension, mine are the following:
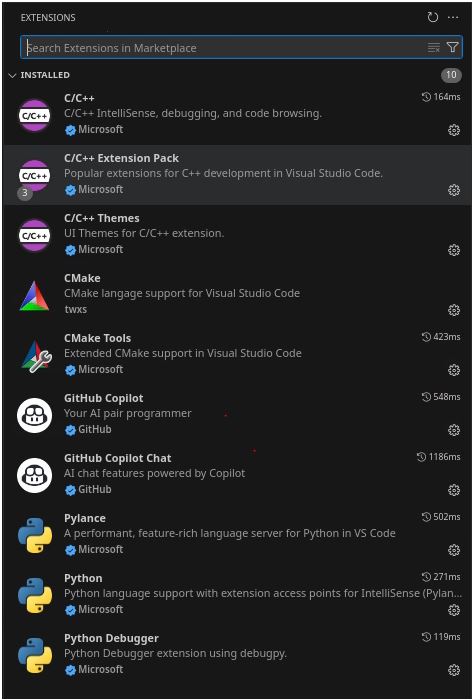
Then open the directory where you have clone the mysql-shell code inside VS and save it as workspace:
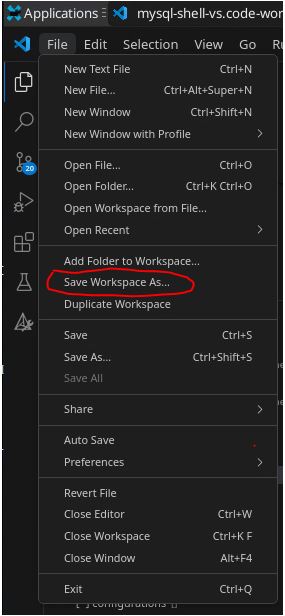
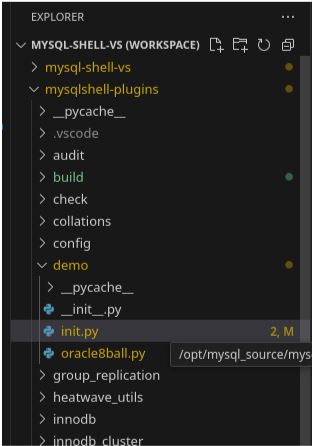
Then click again on the File and add Folder to workspace and add mysql-shell-plugin/demo directory.
Now we need to configure the cmake side of the project:
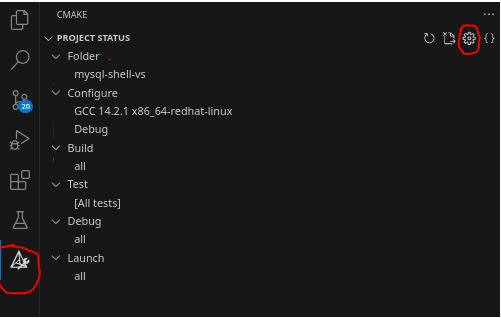
Click on the icon on the left first then on the settings wheel to open the specific menu.
I suggest you to change things at workspace level choosing the workspace tab:
Look for the Cmake: Build Directory option and set it to /<add full path>/mysql_source/mysql-shell-build-vs as outlined before.
Then look for the Cmake: Configure Settings option and click on edit settings.json and set as follow:
"cmake.configureSettings": {
"MYSQL_SOURCE_DIR":"/<add full path>/mysql_source/mysql-server/",
"MYSQL_BUILD_DIR":"/<add full path>/mysql_source/mysql-8.4.4",
"HAVE_PYTHON":true,
"BUNDLED_POLYGLOT_DIR":0,
"WITH_TESTS":true,
"CMAKE_BUILD_TYPE":"Debug",
},
The above will create the Cmake configuration and structure in /<add full path>/mysql_source/mysql-shell-build-vs.
Once this is done compile the project clicking on the small icon close to build
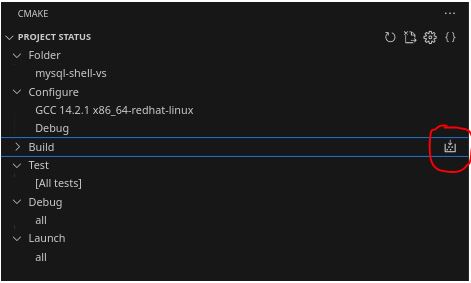
This will build the whole project, sit down and relax while compilation will complete.
Once this is complete click on the run-and-debug icon: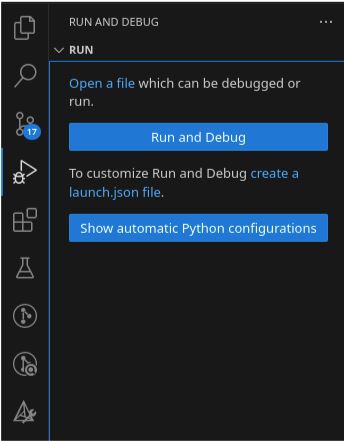
Then click on create a launch.json
Choose mysql-shell-vs:
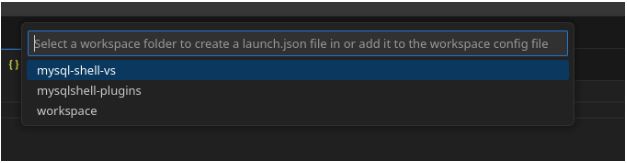
Then pick C/C++ gdb Attach.
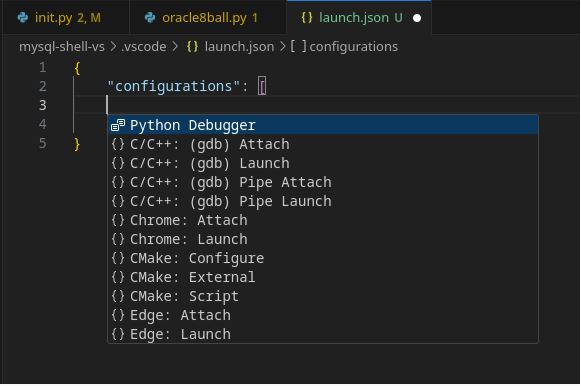
This will open a json file, we are interested in the values inside the “configurations”, it should be something like this:
{
"name": "(gdb) Launch",
"type": "cppdbg",
"request": "launch",
"program": "/<add full path>/mysql_source/mysql-shell-build-vs/bin/mysqlsh",
"args": [
"--verbose=1"
],
"stopAtEntry": false,
"cwd": "/<add full path>/mysql_source/mysql-shell-build-vs/",
"environment": [{"name": "PYTHONPATH", "value": "PATH to your python directory"}],
"externalConsole": false,
"MIMode": "gdb",
"setupCommands": [
{
"description": "Enable pretty-printing for gdb",
"text": "-enable-pretty-printing",
"ignoreFailures": true
},
{
"description": "Set Disassembly Flavor to Intel",
"text": "-gdb-set disassembly-flavor intel",
"ignoreFailures": true
}
]
}
After that you need to add the Python debugger information:
{
"name": "plugin-p",
"type": "debugpy",
"request": "attach",
"connect": {
"host": "localhost",
"port": 5678
},
"pathMappings": [
{
"localRoot": "${workspaceFolder}",
"remoteRoot": "."
}
],
"justMyCode": false
},
As you can see what we will do is to attach the debugger to a process that will spin up inside the code.
Save the file, and in the left panel you will now have the option to run and debug using both debuggers.
Before running the debug let us do a couple of more things.
Click on the project explorer and open the init.py file in the demo directory
Before the instruction: import mysqlsh, add this text:
import debugpy
debugpy.listen(("localhost", 5678))
print("Waiting for debugger attach...")
debugpy.wait_for_client()
print("Debugger attached.")
If the module debugpy is not installed do it with:
pip install debugpy
Then before the last line add:
import mysqlsh
shell = mysqlsh.globals.shell
This to create the shell object that is available only internally to the mysql-shell.
Now let us add a couple of breakpoints one in the mysql-shell code and another inside the python code.
In mysql_shell.cc look for:
for (const auto &dir : plugin_directories) {
get_plugins(file_list, dir, true);
}
In mysql-shell 8.4.4 is at line 964.
Put a breakpoint on get_plugins
Then open oracle8ball.py and put a breakpoint on the last line:
print(answers[index])
Run the C/C++ debugger…
The execution will stop and in the debug left panel you will see the variable informations plus the debug toolbar:
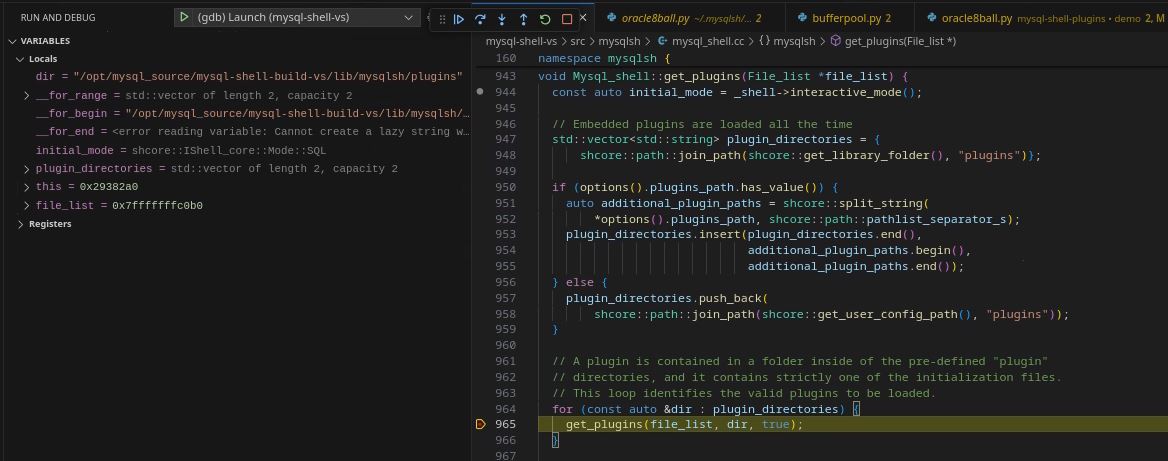
This is standard debug for C/C++ projects … Let us click to proceed.
Execution will continue until loading the plugins then will stop. It will hang because the line we have inserted:
debugpy.wait_for_client()
Now run the Python debugger it will connect to the dbugger we defined in the code allowing the process to continue.
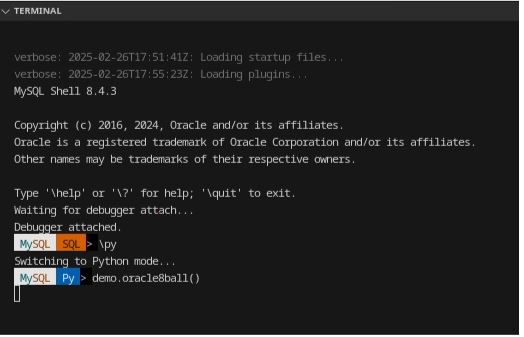
In the terminal window the mysql-shell prompt will appear but not only:
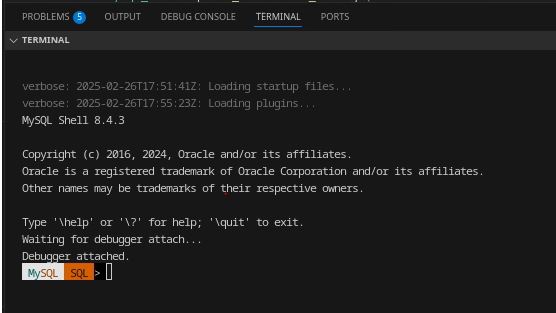
We can see that the python debugger is now also attached.
Let us move to python and execute the demo.oracle8ball()
Execution is suspended and our debugger stop at our breakpoint:
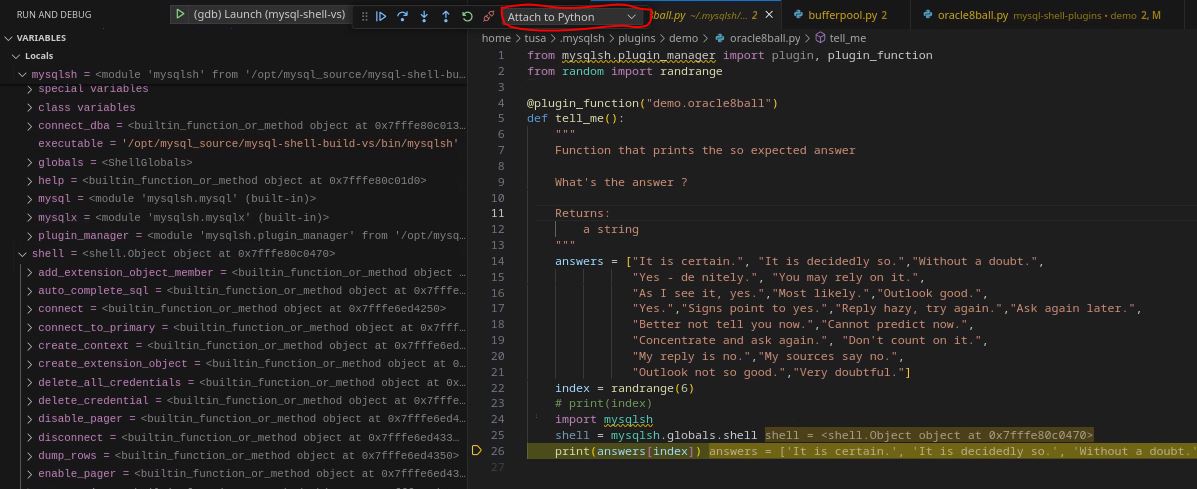
Please note two things, the first is that also in this case we can see the whole set of information related to local and global variables including the shell object and the other is that the debugger menu shows that now the navigation button refers to the python debugger.
This level of integration will give anyone a more friendly environment where to develop your mysql-shell extensions. This is particularly important for the ones who wish to standardize and simplify the DBA operation or to give developers easy access to independently and safely perform actions on the databases.
Tips for Developing MySQL Shell Plugins
Use the MySQL Shell API: MySQL Shell provides a rich API for interacting with MySQL databases. Refer to the official documentation for details.
- Test Incrementally: Test your plugin functions frequently to catch errors early.
- Leverage Python Libraries: You can use any Python library in your plugin, so take advantage of the vast Python ecosystem.
Conclusion
Setting up a development environment for MySQL Shell plugins in Python is straightforward. With the right tools and a bit of Python knowledge, you can create powerful extensions to enhance MySQL Shell's functionality. Whether you're automating database tasks or integrating with other systems, MySQL Shell plugins offer endless possibilities.
Happy coding!